Good Afternoon Everyone!
What a beautiful day! The air is nice and crisp. A slight breeze is blowing. Cooler weather. The sun is shining. Leaves are falling ( I have a feeling that is because it is so dry). We did have a good rain the other day but as dry as we are we could use another rainy day. Oh what a beautiful morning, oh what a beautiful day. I love the fall colors: reds, golds, oranges, browns, greens. They are all beautiful to me.
Saturday morning I will begin a new feature on my blog - the 12 weeks of Christmas. Keep watching! Each week there will be a new item. Something you can make to help you get ahead of the holidays.
Neely
Thursday, September 30, 2010

Tuesday, September 28, 2010
Tuesday Technique - Making your own background paper from stamps
I really enjoy making my own background from stamps. It is a great way to use my stamps not for just embellishing or cards. If I have a stamp set then I can choose my colors and the possibilities are endless.

 Today I made this layout using black, sunny yellow, inks and cardstock. I made the embellishments using the stamp set also. I custom created the stamp that says Corner Yellow Jackets. That is a great feature CTMH offers.
 Step #1 - choose the darkest ink and biggest stamp image you want to use and random stamp your cardstock
Step #2 - choose your next ink and next to biggest stamp image and random stamp your cardstock ( remember use a triangle pattern to random stamp)
Continue adding stamp images and inks that you choose to get the effect you desire - I used only two inks and created a third by second generation stamping with the black. You could use 3 or 4 inks and make a great page.
 Step #3 - cut your stamped page to the sizes you need for your layout and then sponge or swipe the edges to finish them
 Step #4 - assemble your layout and embellish. I also used the same step set to create the helmets with CHS and the ribbon.
After pictures are added and journaling you may want to add more embellishments. If you would like to make this layout contact me and I will be happy to help you.
Neely


Step #2 - choose your next ink and next to biggest stamp image and random stamp your cardstock ( remember use a triangle pattern to random stamp)
Continue adding stamp images and inks that you choose to get the effect you desire - I used only two inks and created a third by second generation stamping with the black. You could use 3 or 4 inks and make a great page.
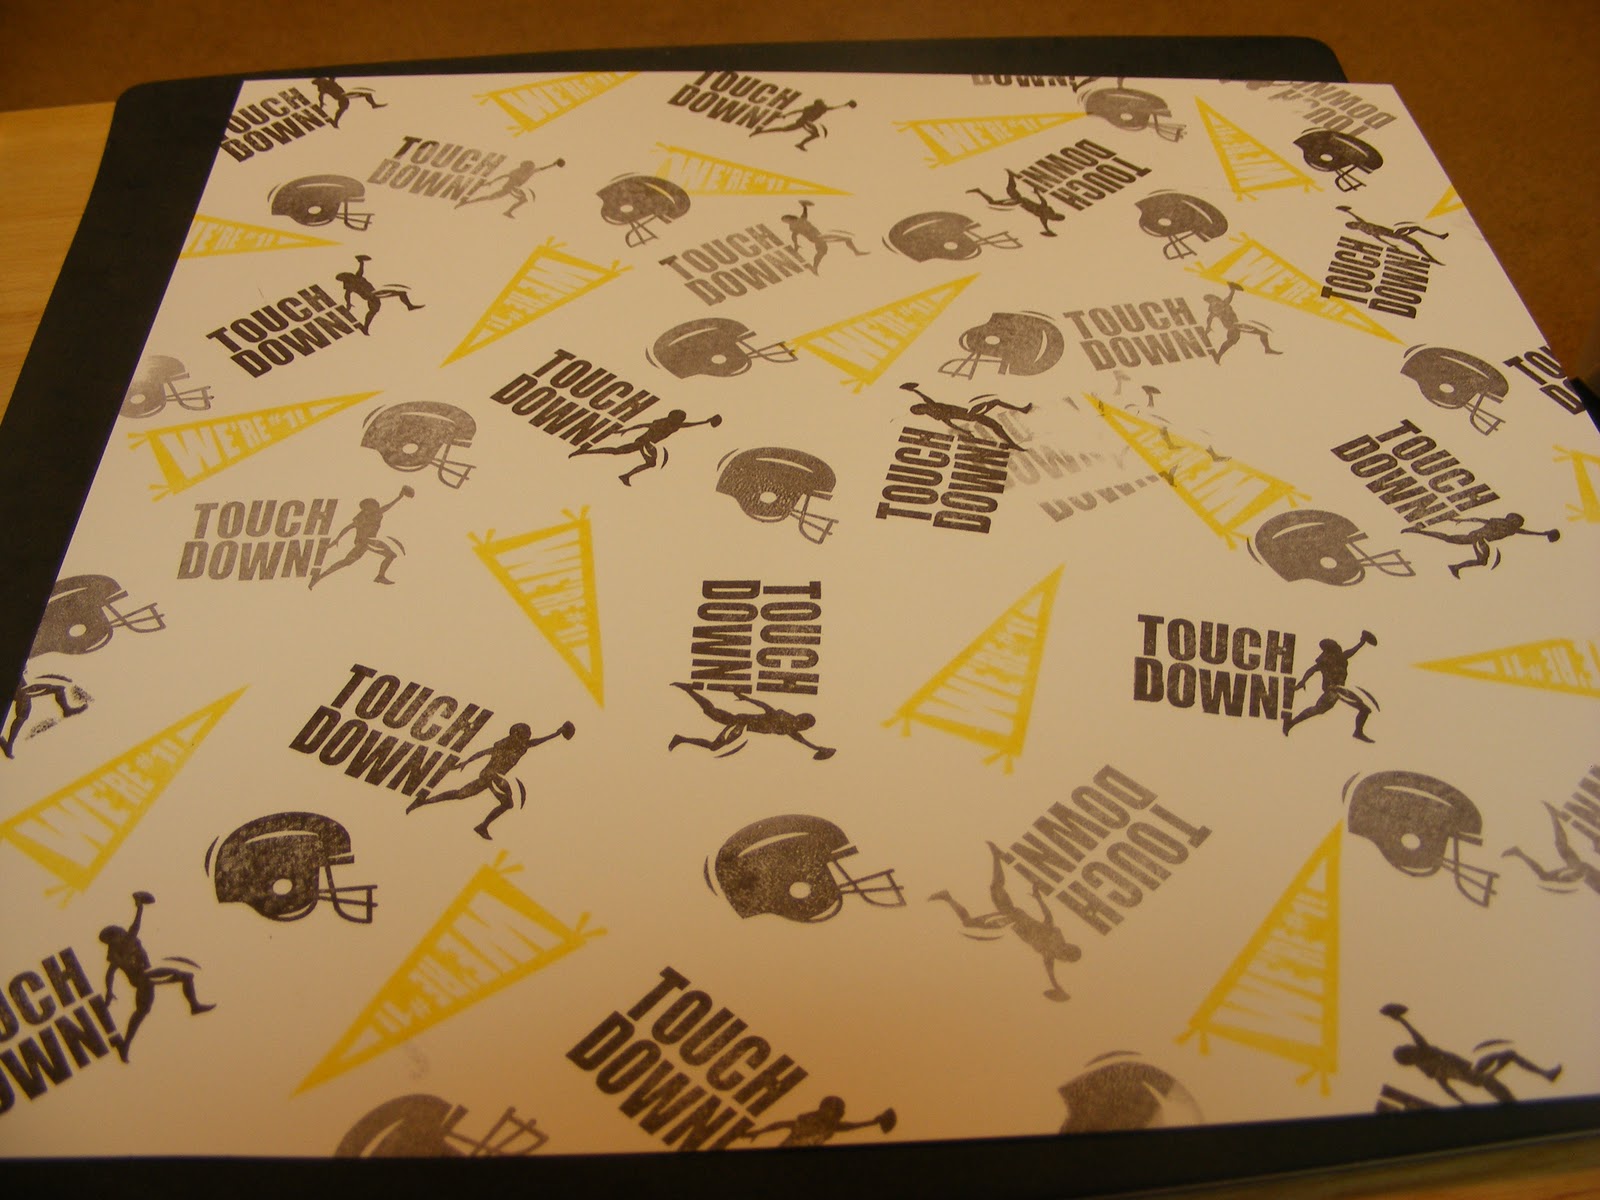

After pictures are added and journaling you may want to add more embellishments. If you would like to make this layout contact me and I will be happy to help you.
Neely
Monday, September 27, 2010
Monday Moments
What a great day! It has been raining off and on today and yesterday. We needed that. Hopefully it will rain even more. The days are turning cooler and it is nice. The girls went to school with a light jacket this morning. Welcome Fall!! The weather is turning and my throat can tell. I woke up Saturday morning with a dry, sore throat. It has just gotten worse over the past two days. I am trying not to talk as much and drink warm drinks. I love hot chocolate, hot tea, and coffee. What a great excuse to sit and drink a cup! Later I think I will curl up with a good book or movie and sip hot tea for a few.
I have had a slower day than normal and it has been wonderful. I am working on my next blog post and making cupcakes to take to Hannah's classroom this afternoon for her birthday. I will post the Tuesday technique of making your own background paper with stamps tomorrow morning. Stay tuned.
Neely
I have had a slower day than normal and it has been wonderful. I am working on my next blog post and making cupcakes to take to Hannah's classroom this afternoon for her birthday. I will post the Tuesday technique of making your own background paper with stamps tomorrow morning. Stay tuned.
Neely
Tuesday, September 21, 2010
Stamping 101
Today we are going to discuss the basics of stamping. When you get your new stamp set from CTMH you need to season your stamps. Take your stamp and stamp it in the lightest ink you have. Then, stamp your stamp on a scrap piece of paper until you don't see anymore ink coming off of the stamp. Do this a couple of times to make sure it is done well. Then clean your stamp. This is called seasoning your stamp. This will help your stamp get a good clean stamp and shouldn't stain the stamp as much. If your stamp does stain it will not affect the stamp image on your piece.
Another tip when stamping, use the foam sheet that comes in your stamp set to cushion and get a good stamp image. To do this, take the foam that is in the stamp set and place it under the paper piece you are stamping on - then stamp your image. This is really helpful when stamping with a stamp that consists of a lot of detail or is really large.
This is a layout I finished with the stamp set Cocktail Alphabet. I had to season this set, so I used it as my picture. This layout was demonstrated by the Loving Hearts team at our team meeting stamp camp. I was unable to attend this year but was able to make this at home.


Another tip when stamping, use the foam sheet that comes in your stamp set to cushion and get a good stamp image. To do this, take the foam that is in the stamp set and place it under the paper piece you are stamping on - then stamp your image. This is really helpful when stamping with a stamp that consists of a lot of detail or is really large.
This is a layout I finished with the stamp set Cocktail Alphabet. I had to season this set, so I used it as my picture. This layout was demonstrated by the Loving Hearts team at our team meeting stamp camp. I was unable to attend this year but was able to make this at home.


Next week, I will show you how to make your own background paper with stamp sets. Don't have the right piece.... Stay tuned.
Saturday, September 18, 2010
Game Day
Good Morning fellow crafters!
This past week has been full of hospital visits and catching up. I wasn't able to post. One of the surgeries went well and the patient is at home. The other was not as good and the patient will be in the hospital for a week or so and is awaiting treatment options.
Today my plan is to watch game day and then the Alabama game at 2:30 and then the Texas vs. Texas Tech game at 6:00. Yes, I am an Alabama fan married to a Texas fan. We did really well in the National Championship game in January. There were some rough moments but we came through.
I am also going to be planning a few of the techniques I will begin to show you starting this upcoming week. I hope to have the next technique posted by Wednesday.
Happy Saturday!
Neely
This past week has been full of hospital visits and catching up. I wasn't able to post. One of the surgeries went well and the patient is at home. The other was not as good and the patient will be in the hospital for a week or so and is awaiting treatment options.
Today my plan is to watch game day and then the Alabama game at 2:30 and then the Texas vs. Texas Tech game at 6:00. Yes, I am an Alabama fan married to a Texas fan. We did really well in the National Championship game in January. There were some rough moments but we came through.
I am also going to be planning a few of the techniques I will begin to show you starting this upcoming week. I hope to have the next technique posted by Wednesday.
Happy Saturday!
Neely
Monday, September 13, 2010
Experienced tool kit
This tool kit includes it all. You will need all of the items from the basic kit and the advanced kit plus add these items. Versa mat (this mat is two sided: one side is a self healing side and the other foam to help with stamping, the versa mat also includes measurements and measures 13x13 so it is perfect for a 12x12 page), sanding kit (this gives added dimension to your edges and can also create some fun backgrounds), scoring stylus (this is a versatile tool that can either be used for dry embossing or for scoring - combine scoring with the sanding kit and create a whole new look), bone folder (this is great when you need to make folds with cardstock or b and t paper), and last but not least the piercing tool kit (this is great for paper piercing, starting a brad, or using the embroidery floss). With all of these items your creativity is endless. Grab your favorite paper, stamps, inks and embellishments and go to town.
Neely
Neely
Thursday, September 9, 2010
Tool kit - advanced
If you are an advanced scrapbooker, card maker, or crafter then I would add these tools to my basic tool kit. I would add liquid glass ( this is great not only for adhesive but for fun designs), sponge or sponge daubers (to add chalk or edging around your project), glue dots (these are great for adhering ribbon or smaller items), and 3-D foam tape (this adds dimension to your project). These are all fun items that you can add to your basic tool kit and make a great project.
Are you wanting more? Stay tuned for Monday to get the experienced kit.
Happy crafting - go make some memories. Post a comment.
Neely
Are you wanting more? Stay tuned for Monday to get the experienced kit.
Happy crafting - go make some memories. Post a comment.
Neely
Subscribe to:
Posts (Atom)