If you are coming from Michelle's Blog, you are on the right track! This technique is highlighted with the Mayberry paper packet in the Idea Book but you will find variations for its’ use through this hop.
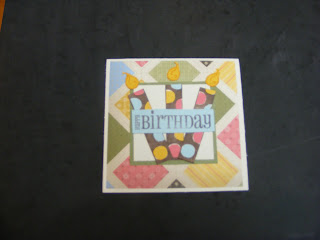
I made two cards for this hop. The first one is 6x6 using the springtime stamp set and the second one is a 4 1/2 x 4 1/2 birthday card.
If you would like to see details on the technique or my supply list, please continue reading below. If not, please continue onto Judy's Blog where you will find some additional artwork highlighting this technique! Be sure to leave a comment and let me know what you thought of my variation and happy hopping!
Supply List:
Paper Packet: Mayberry X7136B
Ink Colors: Cocoa Z2114; Honey Z2162; Olive Z2137; Smoothie Z2196; Crystal Blue Z2117
Stamp set: Springtime D1415; Candlelight C1394
Wishes Card Confidence Program #9033
Mini-Medley Accent Collection: colonial white Z1276
The steps to Paper Piecing are:
1. Stamp images can be broken into layers by stamping on multiple papers and stamping the same image multiple times.
2. Trim around outside edges of images. Trimming details out of images which were stamped multiple times.
3. Attach paper-pieced image to project, clustering accents in groups of three to add visual interest to page.
Thanks for stopping by! Continue onto Judy's Blog to continue the hop!


cute!
ReplyDeleteCute cards! I love that umbrella.
ReplyDeleteNeely, been wanting that stamp set with the candles... Might have to get it now! CUTE cards!
ReplyDeleteWow! Love both cards - the candles take the cake! LOL!
ReplyDelete