I am so sorry. I just realized I didn't have anything set up for today's 12 weeks of Christmas. Please check back Monday morning and I will have it posted.
Neely
Saturday, October 30, 2010
Friday, October 29, 2010
Embossed Gift Tags


This is my new favorite technique. Embossing. This was so fast and easy. I simply stamped my image in the embossing/watermark ink pad and then stamped my image where I wanted it on my project. Next, sprinkle embossing powder over stamped image and shake off excess. Third, using your craft heater heat the image until the image is completely embossed. You will see it change as it is heated and you will know when it is complete.
Thursday, October 28, 2010
Scrapbook in a box

Tuesday, October 26, 2010
More Craft Fair Fun!
I have been working this afternoon on more craft fair items. I do hope that if you live in the area you will visit my booth at the Corner Elementary/Middle School craft fair on November 4 and the Corner High School Theatre craft fair on November 13.


Saturday, October 23, 2010
12 Weeks Before Christmas - week #4
Today I am showing you a great little stationary set. This set can be made with any paper pack and decorated in many ways. Here I just used a general type stamp set but I have made these using Bible verses and Monograms. Make a holder, add 8-10 cards and envelopes, you can even add a pen and joila a cute little gift in no time. Happy Crafting!


Friday, October 22, 2010
Friday October 22
There are no pictures for today. I have been working on more craft fair items. If you are in the area I will be at the Corner Elementary/Middle School craft fair on November 4 and at the Corner Theatre fish fry and craft fair on November 13. Please stop by and visit. I will have items for display and sale.
Today is my niece's birthday and we are going down to South Alabama for her birthday party. She is 10 today.
Tomorrow we will be going back to visit at MSOP where we were students last year. We have a class mate that is graduating next week and will be going back to South Africa. We are going to see them one last time before they fly out. Then we are going to meet another couple we were in school with on the way back home and have dinner. We are looking forward to all of our visits this weekend. With that said, I have a few things to do to get ready to leave after our girls get out of school.
Be sure to check back tomorrow for week 4 of our 12 weeks before Christmas.
Neely
Wednesday, October 20, 2010
Final Page of Baby Album


The other is the card I am using for the gift.
Tuesday, October 19, 2010
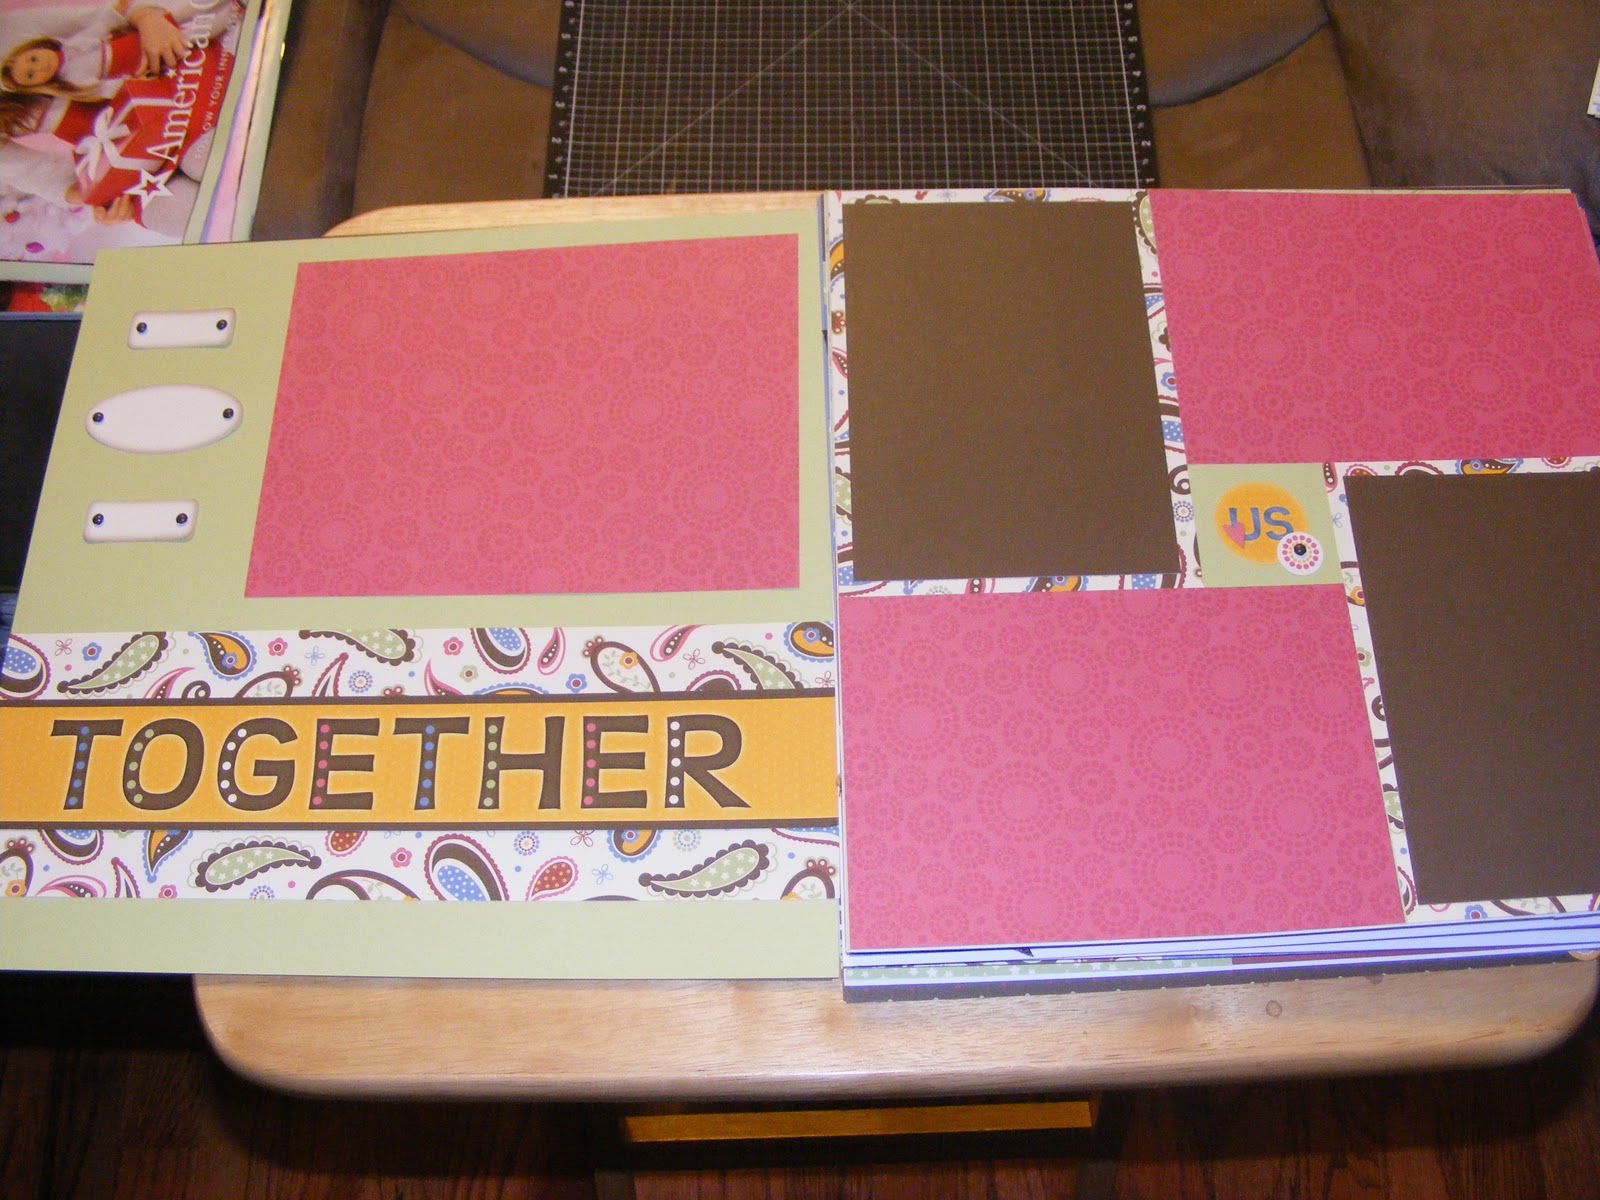
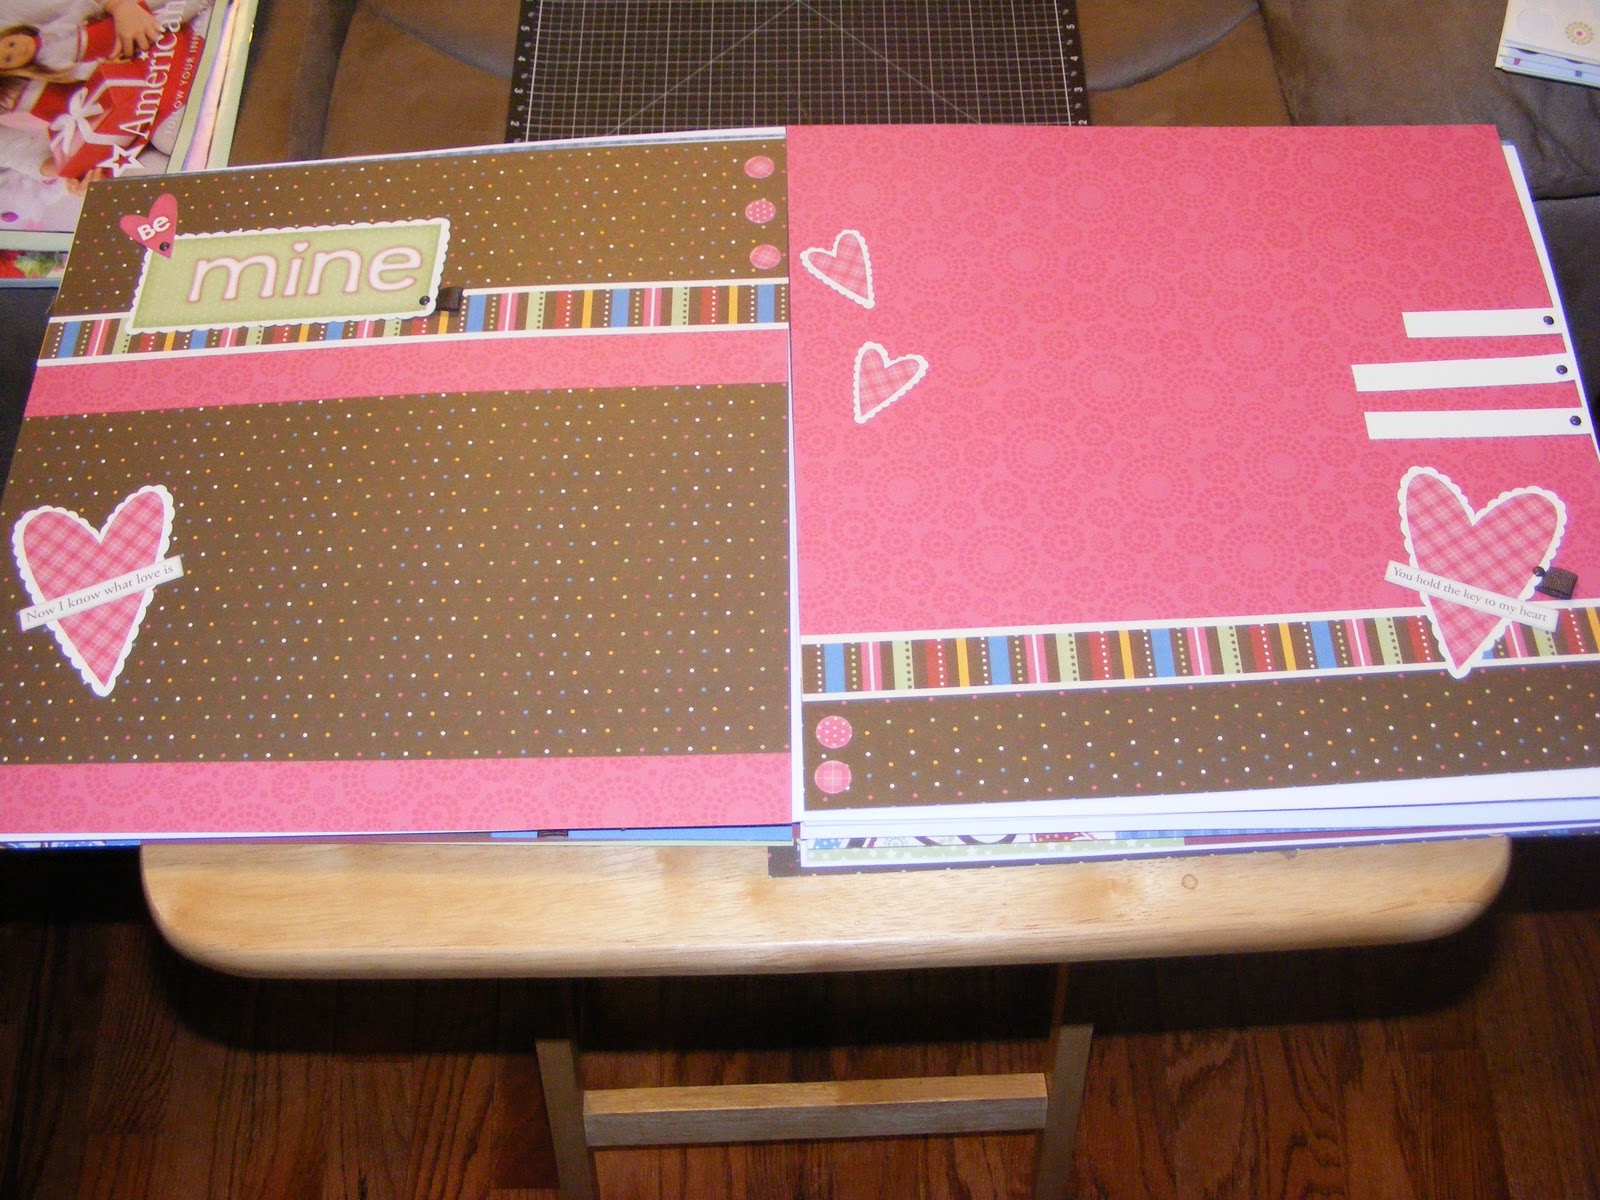
Baby Album
Here is the baby album I created for my cousin. I used a magic moments prepared packet with all the embellishments. I added the name page and the page titled together for the birth day. The rest of the layouts are each months of the babies first year.


Monday, October 18, 2010
No School!
Today and last Friday the girls did not have school. Friday we spent the day doing some shopping and attended a birthday party.
Today, we spent the day close to home. We had a few errands and then spent an hour cleaning the house and then we spent time playing a new game Ubuild Monopoly. We just put the girls to bed and now for some down time.
I am currently working on a baby gift for my cousin who just had her first baby this afternoon at 2:02. She lives in Texas and she had a baby girl. I am making a baby album as part of her gift. This album will be a monthly album she can use for the first year. I will post pictures when I finish which I hope is tomorrow. I just have one more layout to create. Check back soon!
Saturday, October 16, 2010
12 Weeks of Christmas - week #3


Neely
Thursday, October 14, 2010
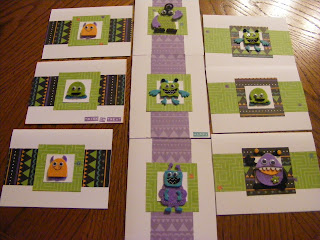
Hooligan Cards
These cards use the fun Hooligans paper packet and the fun Hooligans embellishment assortment. They are just too fun. They have googly eyes, made of felt and are self adhesive backed. What's not to love!! Perfect for those little hooligans in your life. These are also great for Birthdays or that special you did have a great job card.

Tuesday, October 12, 2010
Tuesday


I made this scrapbook in a box too. I used the theatre type stamp set for this box. These are too cute.


Enjoy!!!
Monday, October 11, 2010
Monday Moments
Good Morning Monday!
We got up on time but still seemed to miss the bus. Now that the hustle and bustle of this morning are over I am watching NCIS marathon on USA and checking emails and computer work. I am getting ready to clean the kitchen, work on laundry, and watch my Hubby at 11:00 on OABS. I am still planning on working on items for the craft fair. I will try to post some of my creations tomorrow.
Neely
Sunday, October 10, 2010
Having a Good Weekend
With my husband on a trip for a lectureship the girls and I are taking it easy. Yesterday we had fun watching football games and playing clue and dominos. We had nachos for dinner which my oldest loves.
Today, we started the morning off with Bible class and worship service. Of course, it is always good when we get worship God. We ate lunch with my grandparents and cousins and then came home for a peaceful rest. I took a nap and the girls watched movies, painted fingernails and toenails, and had some art fun. Tonight we are going back to worship services and then to McDonald's probably for supper and then to a Gospel Meeting to hear one of the instructors from MSOP where we were just these past two years.
Tomorrow, the girls will go to school and I plan on beginning to make a lot of crafts for the Corner High School Theatre arts and craft fair in November while I watch Hubby speak on the computer. You can view him at http://www.oabs.org/ and click on 13th Annual Lubbock lectures. I am very excited about getting a booth.
Hubby should return sometime Tuesday. :)
Saturday, October 9, 2010
12 Days of Christmas - week #2
Today I am going to show you a quick and simple gift you make for anyone using few items. This card holder is made using a sheet of background and texture (patterned) paper, 2 sheets of coordinating cardstock, ribbon, brads and your paper trimmer.

Cut your 12x12 cardstock to 6x9. This will be used to make your base. Fold in half so it is the size of 6x 4 1/2. Score at 1 1/2 down the long side. Make a small triangle cut in the middle of the 1 1/2 piece so that the 1 1/2 piece can fold up and the entire base can fold in half. You are trying to make a book. Adhere the 1 1/2 fold to the edges to make a pocket.
Take the left over piece of 6x12 cardstock and cut at 3 so that you have 3x6 pieces of cardstock. You will need 4. Fold those in half and you will get 4 - 3x3 cards.
Cut your patterened (background paper) to a 4x4 piece and then to 4 - 3x3 pieces. You will make 4 cards to put into your card holder. Glue the 4x4 piece to the center of the front of the card holder. Place the 3x3 pieces to the front of the 3x3 cards.

Take your coordinating cardstock color and cut a 3/4 x 4 1/2 piece and 4 - 1x3 pieces. The 3/4 x 4 1/2 piece goes on the front of your card holder toward the bottom. Place your 1x3 pieces on your 3x3 cards. I used brads to embellish on the ends of the 1x3 pieces for the cards. I placed them all in different places or you could put them in the same place.
If you choose you can place an accent piece on the cards with a sentiment or stamp image. Take your eyelet tool and make four small holes on your card holder spaced so the cards could fit between the ribbon holes. Run the ribbon through the holes leaving edges so that you can tie the card holder closed.


Embellish the front with an initial or an image. Your choice. My image on the red is a snowman. I just love them so I use them on everything.

Hope you enjoy!!!
Neely
Thursday, October 7, 2010
Thursday Thrills!!!
These are fun and easy to make for trick or treaters or for school parties.

To make the card:
Cut black cardstock to 3 3/4 x 2 3/4
Cut the white cardstock to 7 1/2 x 2 1/2. You will score the white at 1 inch from the bottom and then fold the rest of the white in half to create the other fold. Staple so you can tuck the white into the stapled part. (Be careful not to staple both pieces or it won't pull out). Glue the white cardstock to the black cardstock. Embellish with a favorite stamp set. Tape or glue a piece of candy to the inside of the white.

Cut the blue/green cardstock to 4 1/4 x 4 (fold in half).
Cut the orange pattern paper to 3 3/4 x 1 3/4 ( you will need two of these).
Cut the black square to 1 1/2 x 1 1/2 ( you will need two so you can cover up the staple).
To assemble fold the blue/green cardstock in half over the filled treat bags, staple. Glue the orange pattern paper over the center of the cardstock on front and back. Then place the black square in the center. Embellish as desired. I stamped and cut out a pumpkin.
You can make these any size you want. Just measure your clear bag size and make sure your cardstock is a little longer. Then adjust your measurements for your decorative pieces. Embellish and enjoy!
Simple, fast, and fun. Your children will love helping you to make these for their friends.

To make the card:
Cut black cardstock to 3 3/4 x 2 3/4
Cut the white cardstock to 7 1/2 x 2 1/2. You will score the white at 1 inch from the bottom and then fold the rest of the white in half to create the other fold. Staple so you can tuck the white into the stapled part. (Be careful not to staple both pieces or it won't pull out). Glue the white cardstock to the black cardstock. Embellish with a favorite stamp set. Tape or glue a piece of candy to the inside of the white.

To make the treat bag:
Cut the blue/green cardstock to 4 1/4 x 4 (fold in half).
Cut the orange pattern paper to 3 3/4 x 1 3/4 ( you will need two of these).
Cut the black square to 1 1/2 x 1 1/2 ( you will need two so you can cover up the staple).
To assemble fold the blue/green cardstock in half over the filled treat bags, staple. Glue the orange pattern paper over the center of the cardstock on front and back. Then place the black square in the center. Embellish as desired. I stamped and cut out a pumpkin.
You can make these any size you want. Just measure your clear bag size and make sure your cardstock is a little longer. Then adjust your measurements for your decorative pieces. Embellish and enjoy!
Simple, fast, and fun. Your children will love helping you to make these for their friends.
Wednesday, October 6, 2010
October Stamp of the Month

Saturday, October 2, 2010
New Feature - 12 weeks before Christmas
I have to say I got this idea from the 2nd Year 2009 Wives Class at the Memphis School of Preaching. They played the 12 days of Christmas with the first year Wives Class. It was too fun so I wanted to play with you. So, starting today I am going to be posting what I call the 12 weeks of Christmas instead of the 12 days of Christmas. I do not like feeling rushed at the holiday time but every year it is the same thing. Last minute baking, shopping, and crafting possibly forgetting the Christmas cards. I am trying to turn over a new leaf. I the first two for the exciting weekly feature already created and ready for posting. I am hoping to stay on top of the game.
On the first week before Christmas my true love made for me.... a wall hanging. This wall hanging is made using the hooligans paper packet, dimensional elements monograms, opaques, glitter and a touch of ribbon along with our new mix n mingle album. The paper is cut into 4x4 squares. Embellish as desired. This wall hanging can stand along as is or pictures can be added. This wall hanging can easily be made using any paper packet desired to be customized for your giftee by matching the paper to favorite colors or home decor or use a seasonal pattern for a particular season. The possibilities are endless.

Sorry it is turned sideways. I haven't figured out how to rotate it. The ribbon should be at the top for a wall hanging.
Neely
Subscribe to:
Posts (Atom)